
使用 Ktor 與 Kotlin 處理 HTTP 請求並產生回應
在本教學中,你將透過建置任務管理器應用程式,學習在 Kotlin 中使用 Ktor 進行路由、處理請求以及處理參數的基本概念。
完成本教學後,你將了解如何執行以下操作:
- 處理 GET 與 POST 請求。
- 從請求中擷取資訊。
- 在轉換資料時處理錯誤。
- 使用單元測試驗證路由。
先決條件
這是「Ktor Server 入門」指南的第二篇教學。你可以單獨研讀本教學,但強烈建議你先完成前一篇教學,以了解如何建立、開啟並執行新的 Ktor 專案了解如何使用 Ktor 開啟、執行和測試伺服器應用程式。。
對 HTTP 請求類型、標頭與狀態碼有基本了解也會很有幫助。
我們建議安裝 IntelliJ IDEA,但你也可以選用其他慣用的 IDE。
任務管理器應用程式
在本教學中,你將逐步建置具有以下功能的任務管理器應用程式:
- 以 HTML 表格檢視所有可用的任務。
- 依優先順序和名稱檢視任務(同樣以 HTML 呈現)。
- 透過提交 HTML 表單來新增任務。
你將以最精簡的方式實作基本功能,然後在七個反覆迭代中改進並擴充這些功能。此最精簡的功能將由包含數個模型型別、值清單以及單一路由的專案組成。
顯示靜態 HTML 內容
在第一個反覆迭代中,你將在應用程式中新增一個會傳回靜態 HTML 內容的新路由。
使用 Ktor 專案產生器建立一個新專案,並將 com.example.ktor-task-app 設為 Project artifact 名稱。
- 開啟 src/main/kotlin 資料夾內的 Routing.kt 檔案。
將既有的
Application.configureRouting()函式替換為以下實作:kotlinfun Application.configureRouting() { routing { get("/tasks") { call.respondText( contentType = ContentType.parse("text/html"), text = """ <h3>TODO:</h3> <ol> <li>A table of all the tasks</li> <li>A form to submit new tasks</li> </ol> """.trimIndent() ) } } }至此,你已經為 URL
/tasks和 GET 請求類型建立了一個新路由。GET 請求是 HTTP 中最基本的請求類型。當使用者在瀏覽器的網址列中輸入內容或點擊一般的 HTML 連結時就會觸發此請求。目前,你只需傳回靜態內容。為了通知用戶端你將發送 HTML,請將 HTTP
Content-Type標頭設定為"text/html"。IDE 會自動新增以下匯入以存取
ContentType物件:kotlinimport io.ktor.http.ContentType在 IntelliJ IDEA 中,點擊 main.kt 檔案中
main()函式旁邊的裝訂邊執行圖示( )以啟動應用程式。
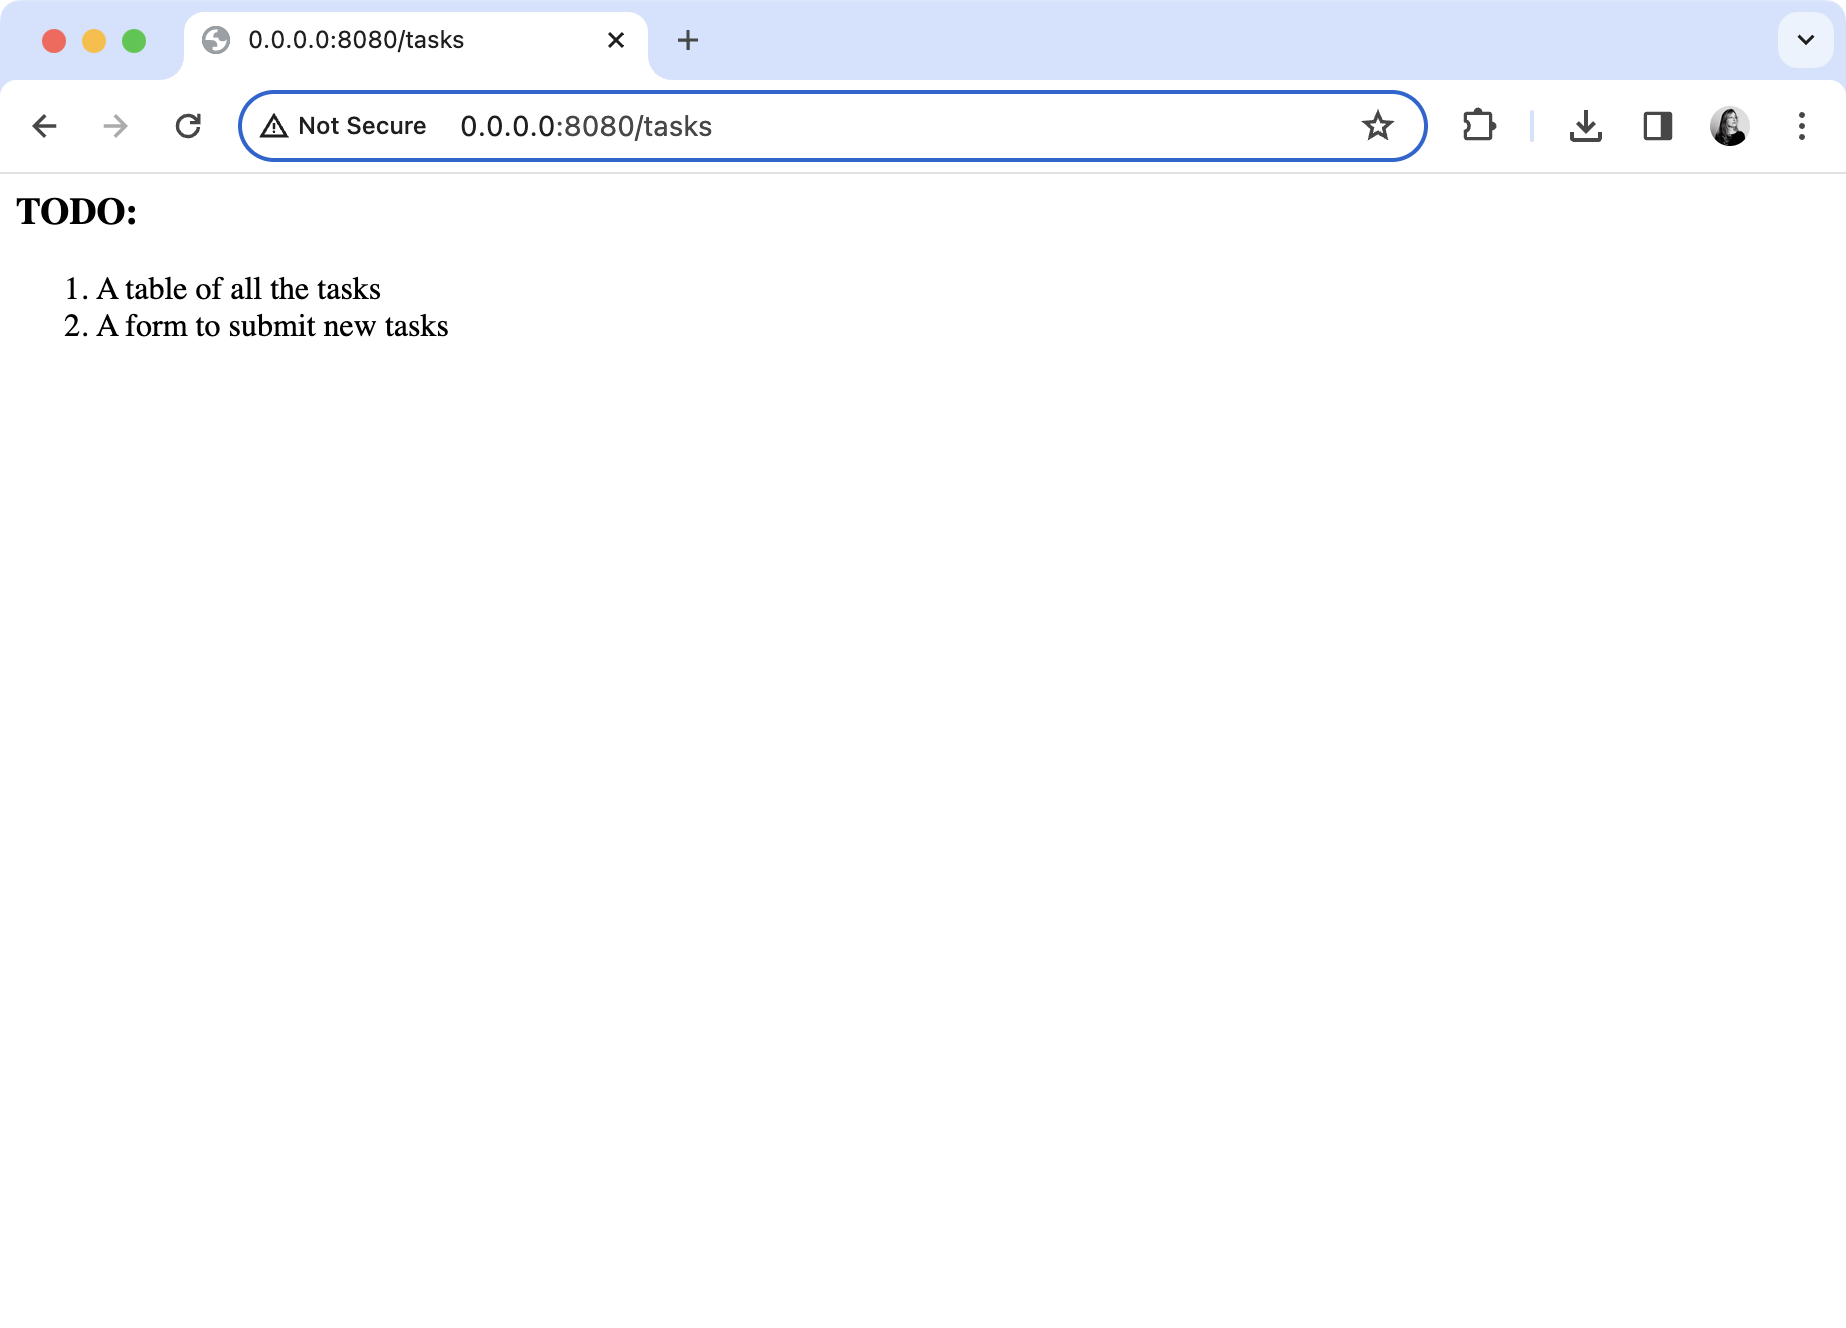
在瀏覽器中前往 http://0.0.0.0:8080/tasks。你應該會看到顯示的待辦事項清單:
實作任務模型
既然你已經建立了專案並設定了基本路由,接下來將透過執行以下操作來擴充你的應用程式:
建立模型型別
在 src/main/kotlin 內,建立名為 model 的新子套件。
在 model 目錄中,建立新的 Task.kt 檔案。
開啟 Task.kt 檔案,新增以下用於表示優先順序的
enum以及表示任務的class:kotlinpackage com.example.model enum class Priority { Low, Medium, High, Vital } data class Task( val name: String, val description: String, val priority: Priority )你將在 HTML 表格中向用戶端發送任務資訊。 在同一個 Task.kt 檔案中,新增以下擴充函式:
kotlinfun Task.taskAsRow() = """ <tr> <td>$name</td><td>$description</td><td>$priority</td> </tr> """.trimIndent() fun List<Task>.tasksAsTable() = this.joinToString( prefix = "<table rules=\"all\">", postfix = "</table>", separator = "\n", transform = Task::taskAsRow )Task.taskAsRow()函式讓Task物件能夠算繪為表格列。List<Task>.tasksAsTable()函式允許將任務清單算繪為表格。
建立範例值
在你的 model 目錄中,建立新的 TaskRepository.kt 檔案。
開啟 TaskRepository.kt 並新增以下程式碼以定義 Task 清單:
kotlinpackage com.example.model private val tasks = mutableListOf( Task("cleaning", "Clean the house", Priority.Low), Task("gardening", "Mow the lawn", Priority.Medium), Task("shopping", "Buy the groceries", Priority.High), Task("painting", "Paint the fence", Priority.Medium) )
新增路由
開啟 Routing.kt 檔案,並將既有的
Application.configureRouting()函式替換為以下實作:kotlinfun Application.configureRouting() { routing { get("/tasks") { call.respondText( contentType = ContentType.parse("text/html"), text = tasks.tasksAsTable() ) } } }現在你不再是向用戶端傳回靜態內容,而是提供任務清單。由於清單無法直接透過網路傳送,因此必須將其轉換為用戶端能夠理解的格式。在這種情況下,任務會被轉換為 HTML 表格。
新增必要的匯入:
kotlinimport com.example.model.*
測試新功能
在 IntelliJ IDEA 中,點擊重新執行按鈕(
 ) 以重新啟動應用程式。
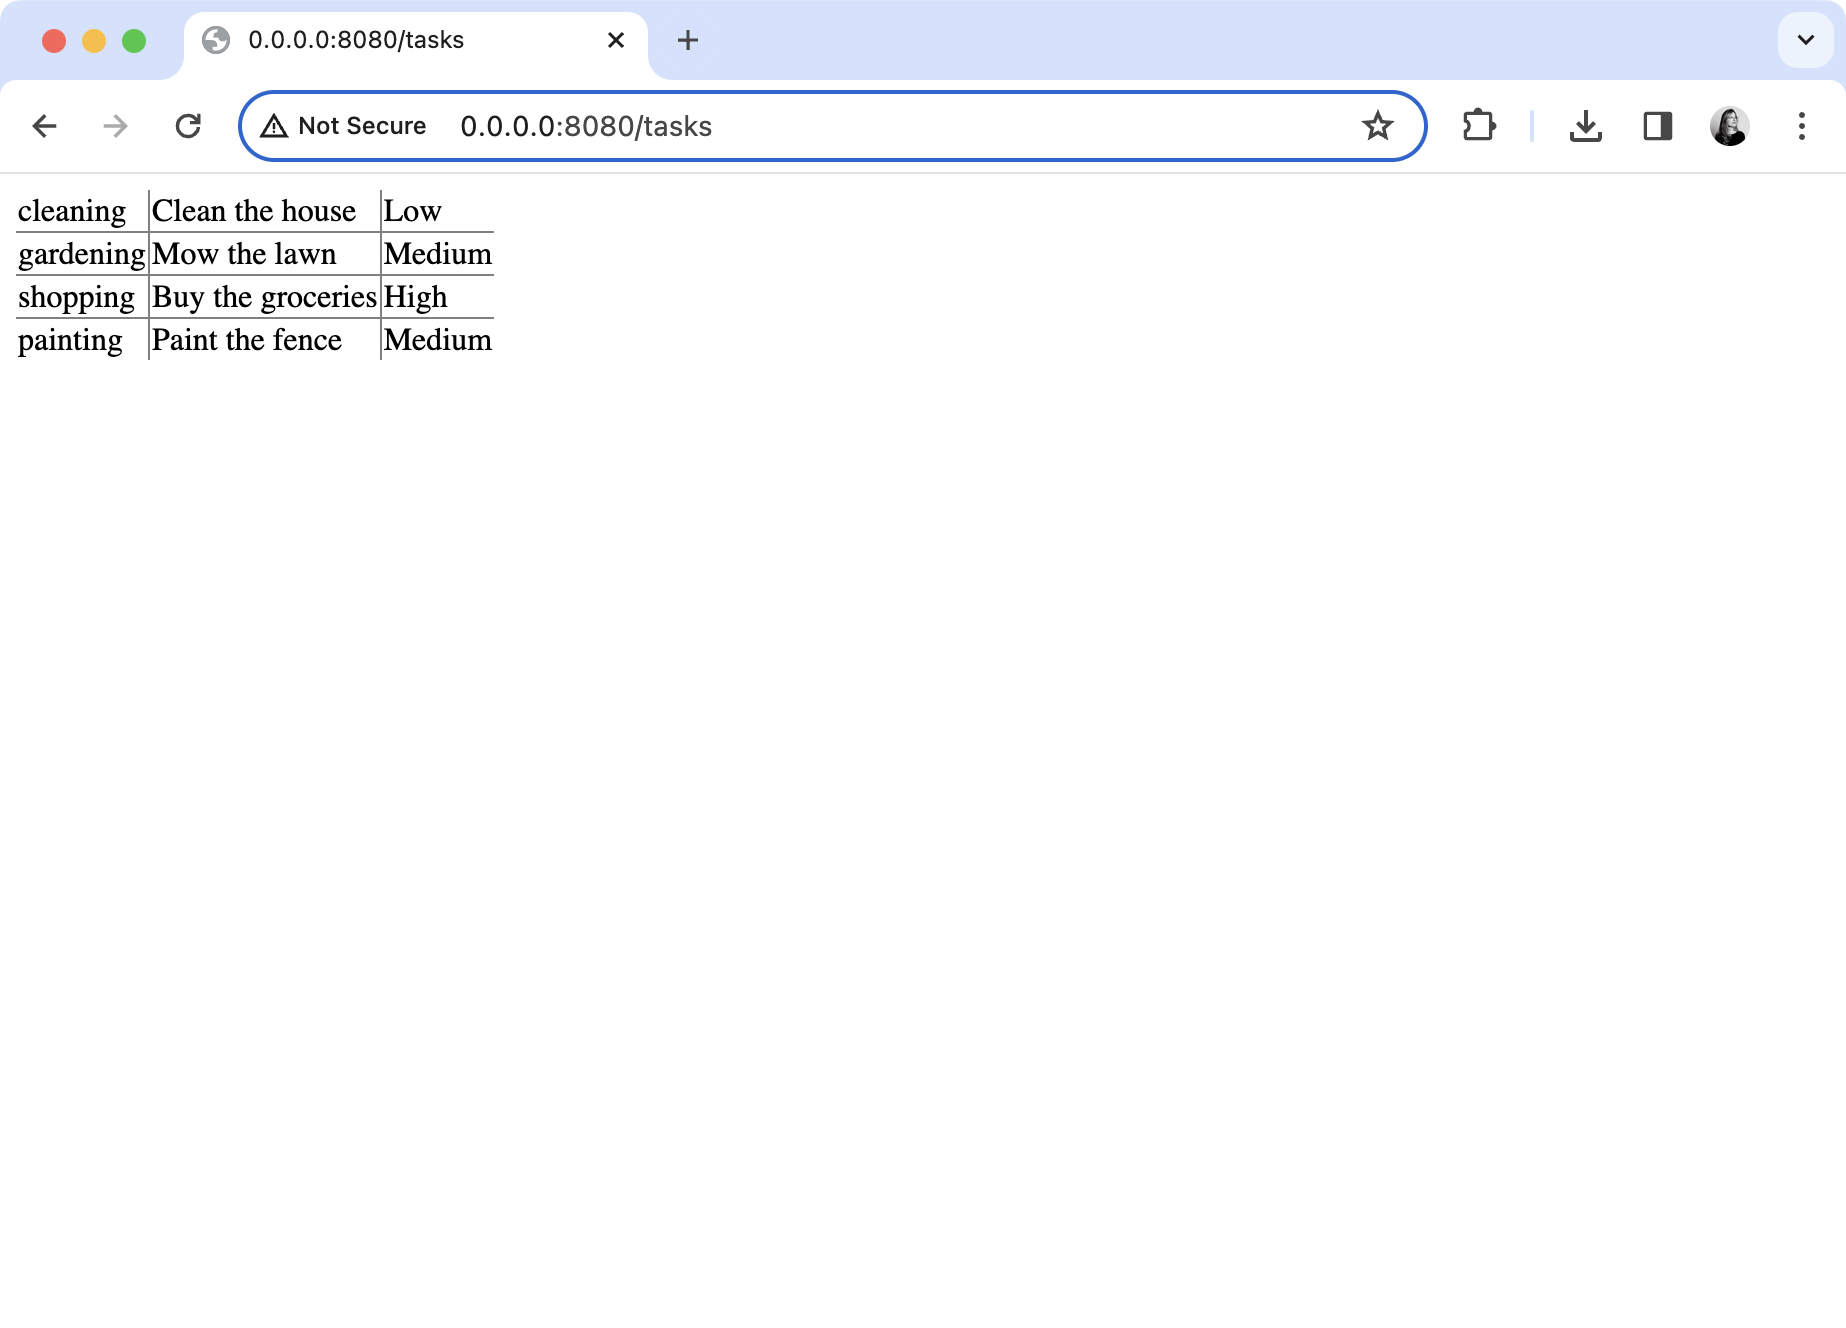
在瀏覽器中前往 http://0.0.0.0:8080/tasks。它應該會顯示一個包含任務的 HTML 表格:
若是如此,恭喜!應用程式的基本功能已正常運作。
重構模型
在繼續擴充應用程式的功能之前,你將透過把值清單封裝在存儲庫中來重構設計。這能讓你集中管理資料,進而專注於 Ktor 特有的程式碼。
返回 TaskRepository.kt 檔案,並將既有的任務清單替換為以下程式碼:
kotlinpackage com.example.model object TaskRepository { private val tasks = mutableListOf( Task("cleaning", "Clean the house", Priority.Low), Task("gardening", "Mow the lawn", Priority.Medium), Task("shopping", "Buy the groceries", Priority.High), Task("painting", "Paint the fence", Priority.Medium) ) fun allTasks(): List<Task> = tasks.toList() fun tasksByPriority(priority: Priority) = tasks.filter { it.priority == priority } fun taskByName(name: String) = tasks.find { it.name.equals(name, ignoreCase = true) } fun addTask(task: Task) { if(taskByName(task.name) != null) { throw IllegalStateException("Cannot duplicate task names!") } tasks.add(task) } }這實作了基於清單的任務基本資料存放區。出於說明目的,任務新增的順序將會保留,但會透過擲出例外來禁止重複的任務。
在後續的教學中,你將學習如何實作透過 Exposed 程式庫連線到關聯式資料庫的存儲庫。
現在,你將在路由中使用這個存儲庫。
開啟 Routing.kt 檔案,並將既有的
Application.configureRouting()函式替換為以下實作:kotlinfun Application.configureRouting() { routing { get("/tasks") { val tasks = TaskRepository.allTasks() call.respondText( contentType = ContentType.parse("text/html"), text = tasks.tasksAsTable() ) } } }當請求到達時,會使用存儲庫來擷取目前的任務清單。接著,會建立包含這些任務的 HTTP 回應。
測試重構後的程式碼
在 IntelliJ IDEA 中,點擊重新執行按鈕(
) 以重新啟動應用程式。在瀏覽器中前往 http://0.0.0.0:8080/tasks。輸出應該保持不變,並顯示 HTML 表格:
使用參數
在本次反覆迭代中,你將允許使用者依優先順序檢視任務。為此,你的應用程式必須允許對以下 URL 發出 GET 請求:
你要新增的路由是 /tasks/byPriority/{priority?} ,其中 {priority?} 表示你需要在執行時期擷取的路徑參數,問號則表示該參數是可選的。路徑參數可以取任何你喜歡的名稱,但 priority 顯然是最合適的選擇。
處理該請求的程序可以概括如下:
- 從請求中擷取名為
priority的路徑參數。 - 如果缺少此參數,則傳回
400 Bad Request狀態。 - 將參數的文字值轉換為
Priority列舉值。 - 如果轉換失敗,則傳回帶有
400狀態碼的回應。 - 使用存儲庫尋找具有指定優先順序的所有任務。
- 如果沒有相符的任務,則傳回
404 Not Found狀態。 - 傳回相符的任務,格式化為 HTML 表格。
你將先實作這項功能,然後尋找最佳方法來檢查它是否正常運作。
新增路由
開啟 Routing.kt 檔案並將以下路由加入程式碼中:
routing {
    get("/tasks") {
        //...
    }

    //add the following route
    get("/tasks/byPriority/{priority?}") {
        val priorityAsText = call.parameters["priority"]
        if (priorityAsText == null) {
            call.respond(HttpStatusCode.BadRequest)
            return@get
        }

        try {
            val priority = Priority.valueOf(priorityAsText)
            val tasks = TaskRepository.tasksByPriority(priority)

            if (tasks.isEmpty()) {
                call.respond(HttpStatusCode.NotFound)
                return@get
            }

            call.respondText(
                contentType = ContentType.parse("text/html"),
                text = tasks.tasksAsTable()
            )
        } catch(ex: IllegalArgumentException) {
            call.respond(HttpStatusCode.BadRequest)
        }
    }
}
透過上述程式碼,你為 URL /tasks/byPriority/{priority?} 編寫了一個處理常式。符號 priority 代表使用者加入的路徑參數。遺憾的是,在伺服器端無法保證它一定是對應 Kotlin 列舉中的四個值之一,因此必須手動檢查。
如果缺少該路徑參數,伺服器會向用戶端傳回 400 狀態碼。否則,它會擷取參數的值,並嘗試將其轉換為列舉的成員。如果轉換失敗,則會擲出例外,伺服器會捕獲該例外並傳回 400 狀態碼。
假設轉換成功,則會使用存儲庫尋找相符的 Task。如果沒有指定優先順序的任務,伺服器會傳回 404 狀態碼,否則會在 HTML 表格中發送相符的項目。
測試新路由
在 IntelliJ IDEA 中,點擊重新執行按鈕(
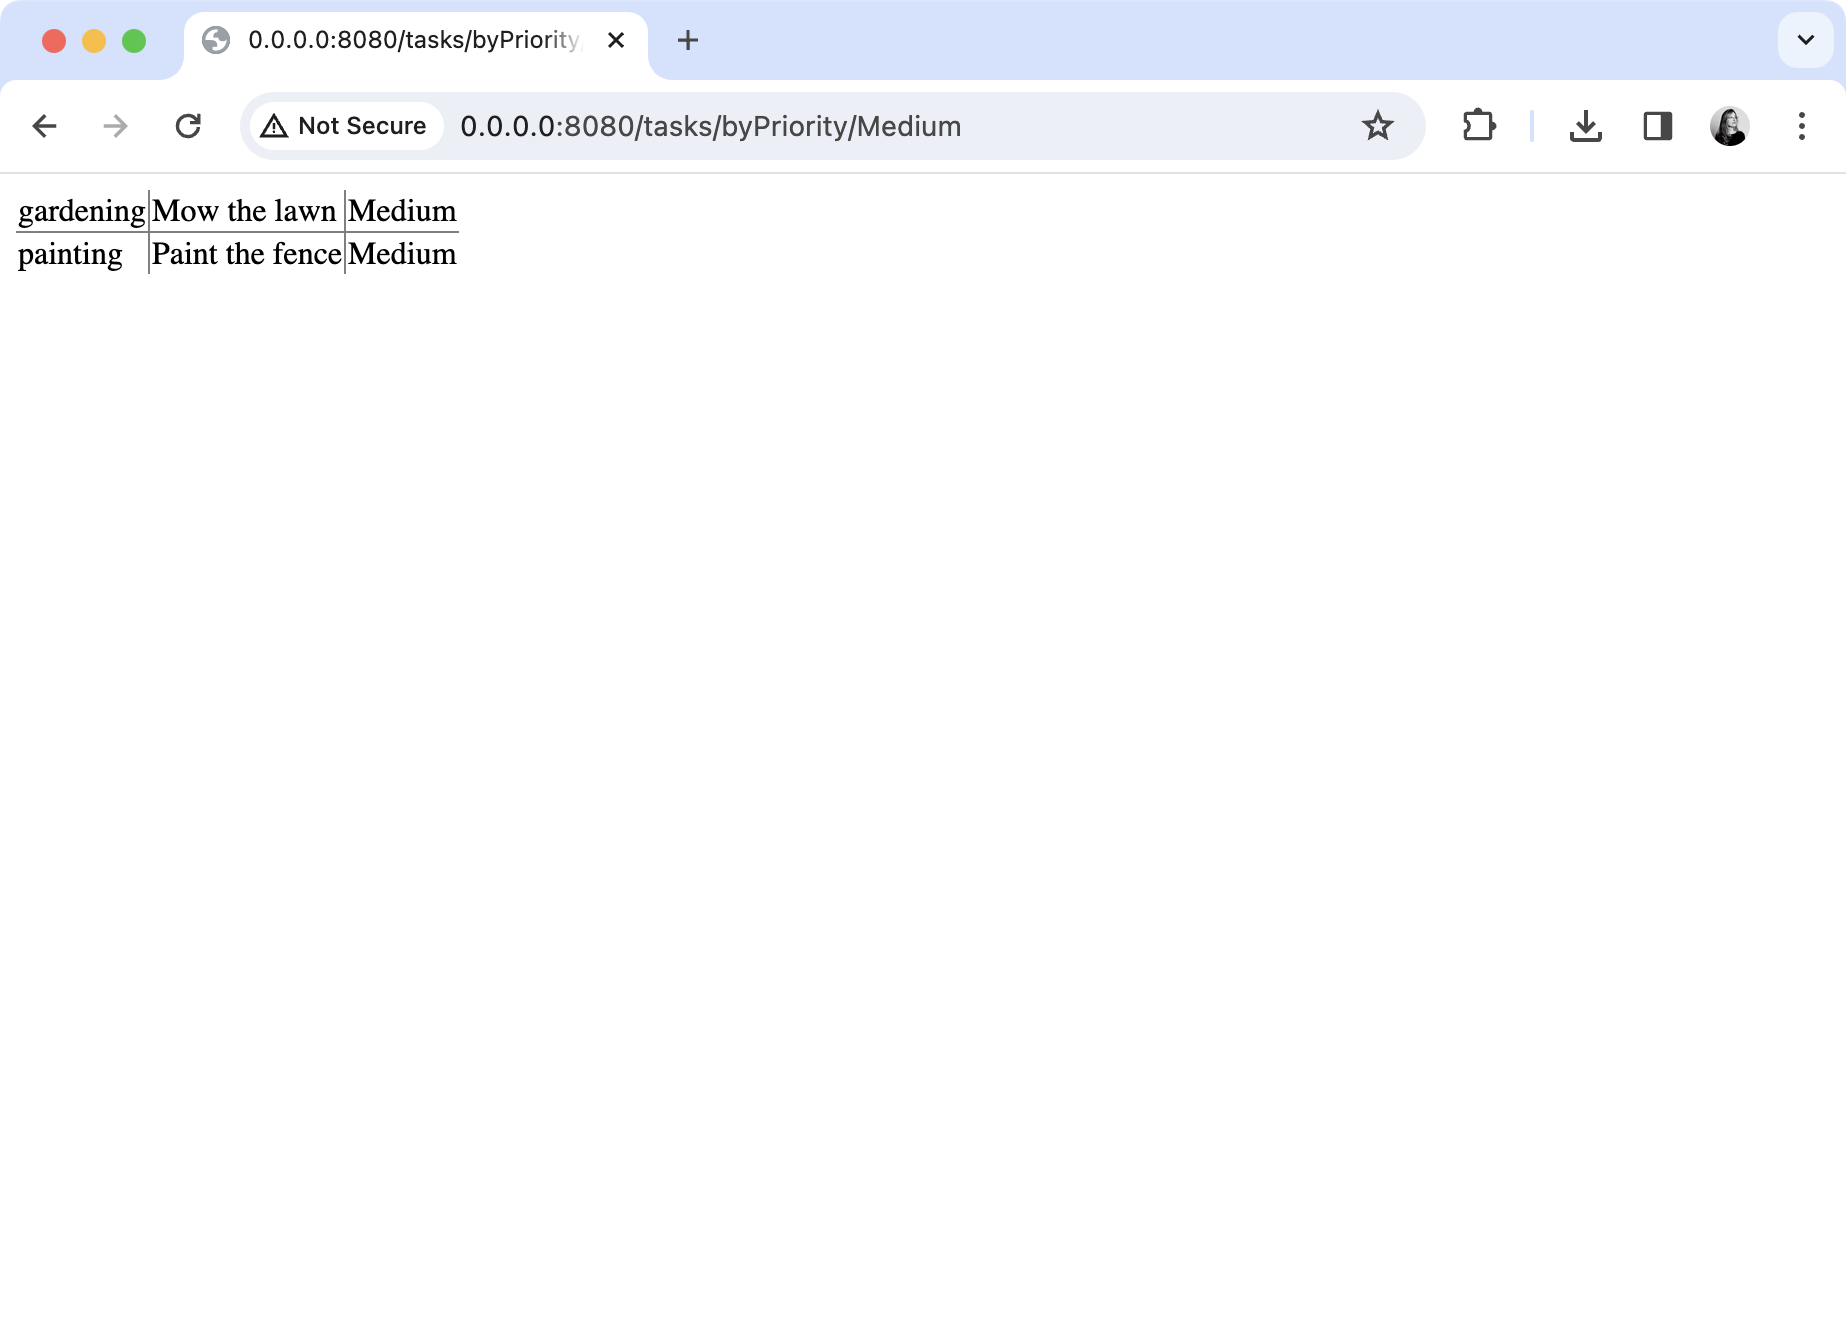
) 以重新啟動應用程式。若要擷取所有中等優先順序的任務,請前往 http://0.0.0.0:8080/tasks/byPriority/Medium:
遺憾的是,在發生錯誤時,透過瀏覽器進行測試的能力有限。除非使用開發者擴充套件,否則瀏覽器不會顯示失敗回應的詳細資料。更簡單的替代方案是使用專門工具,例如 Postman。
在 Postman 中,對相同的 URL
http://0.0.0.0:8080/tasks/byPriority/Medium發送 GET 請求。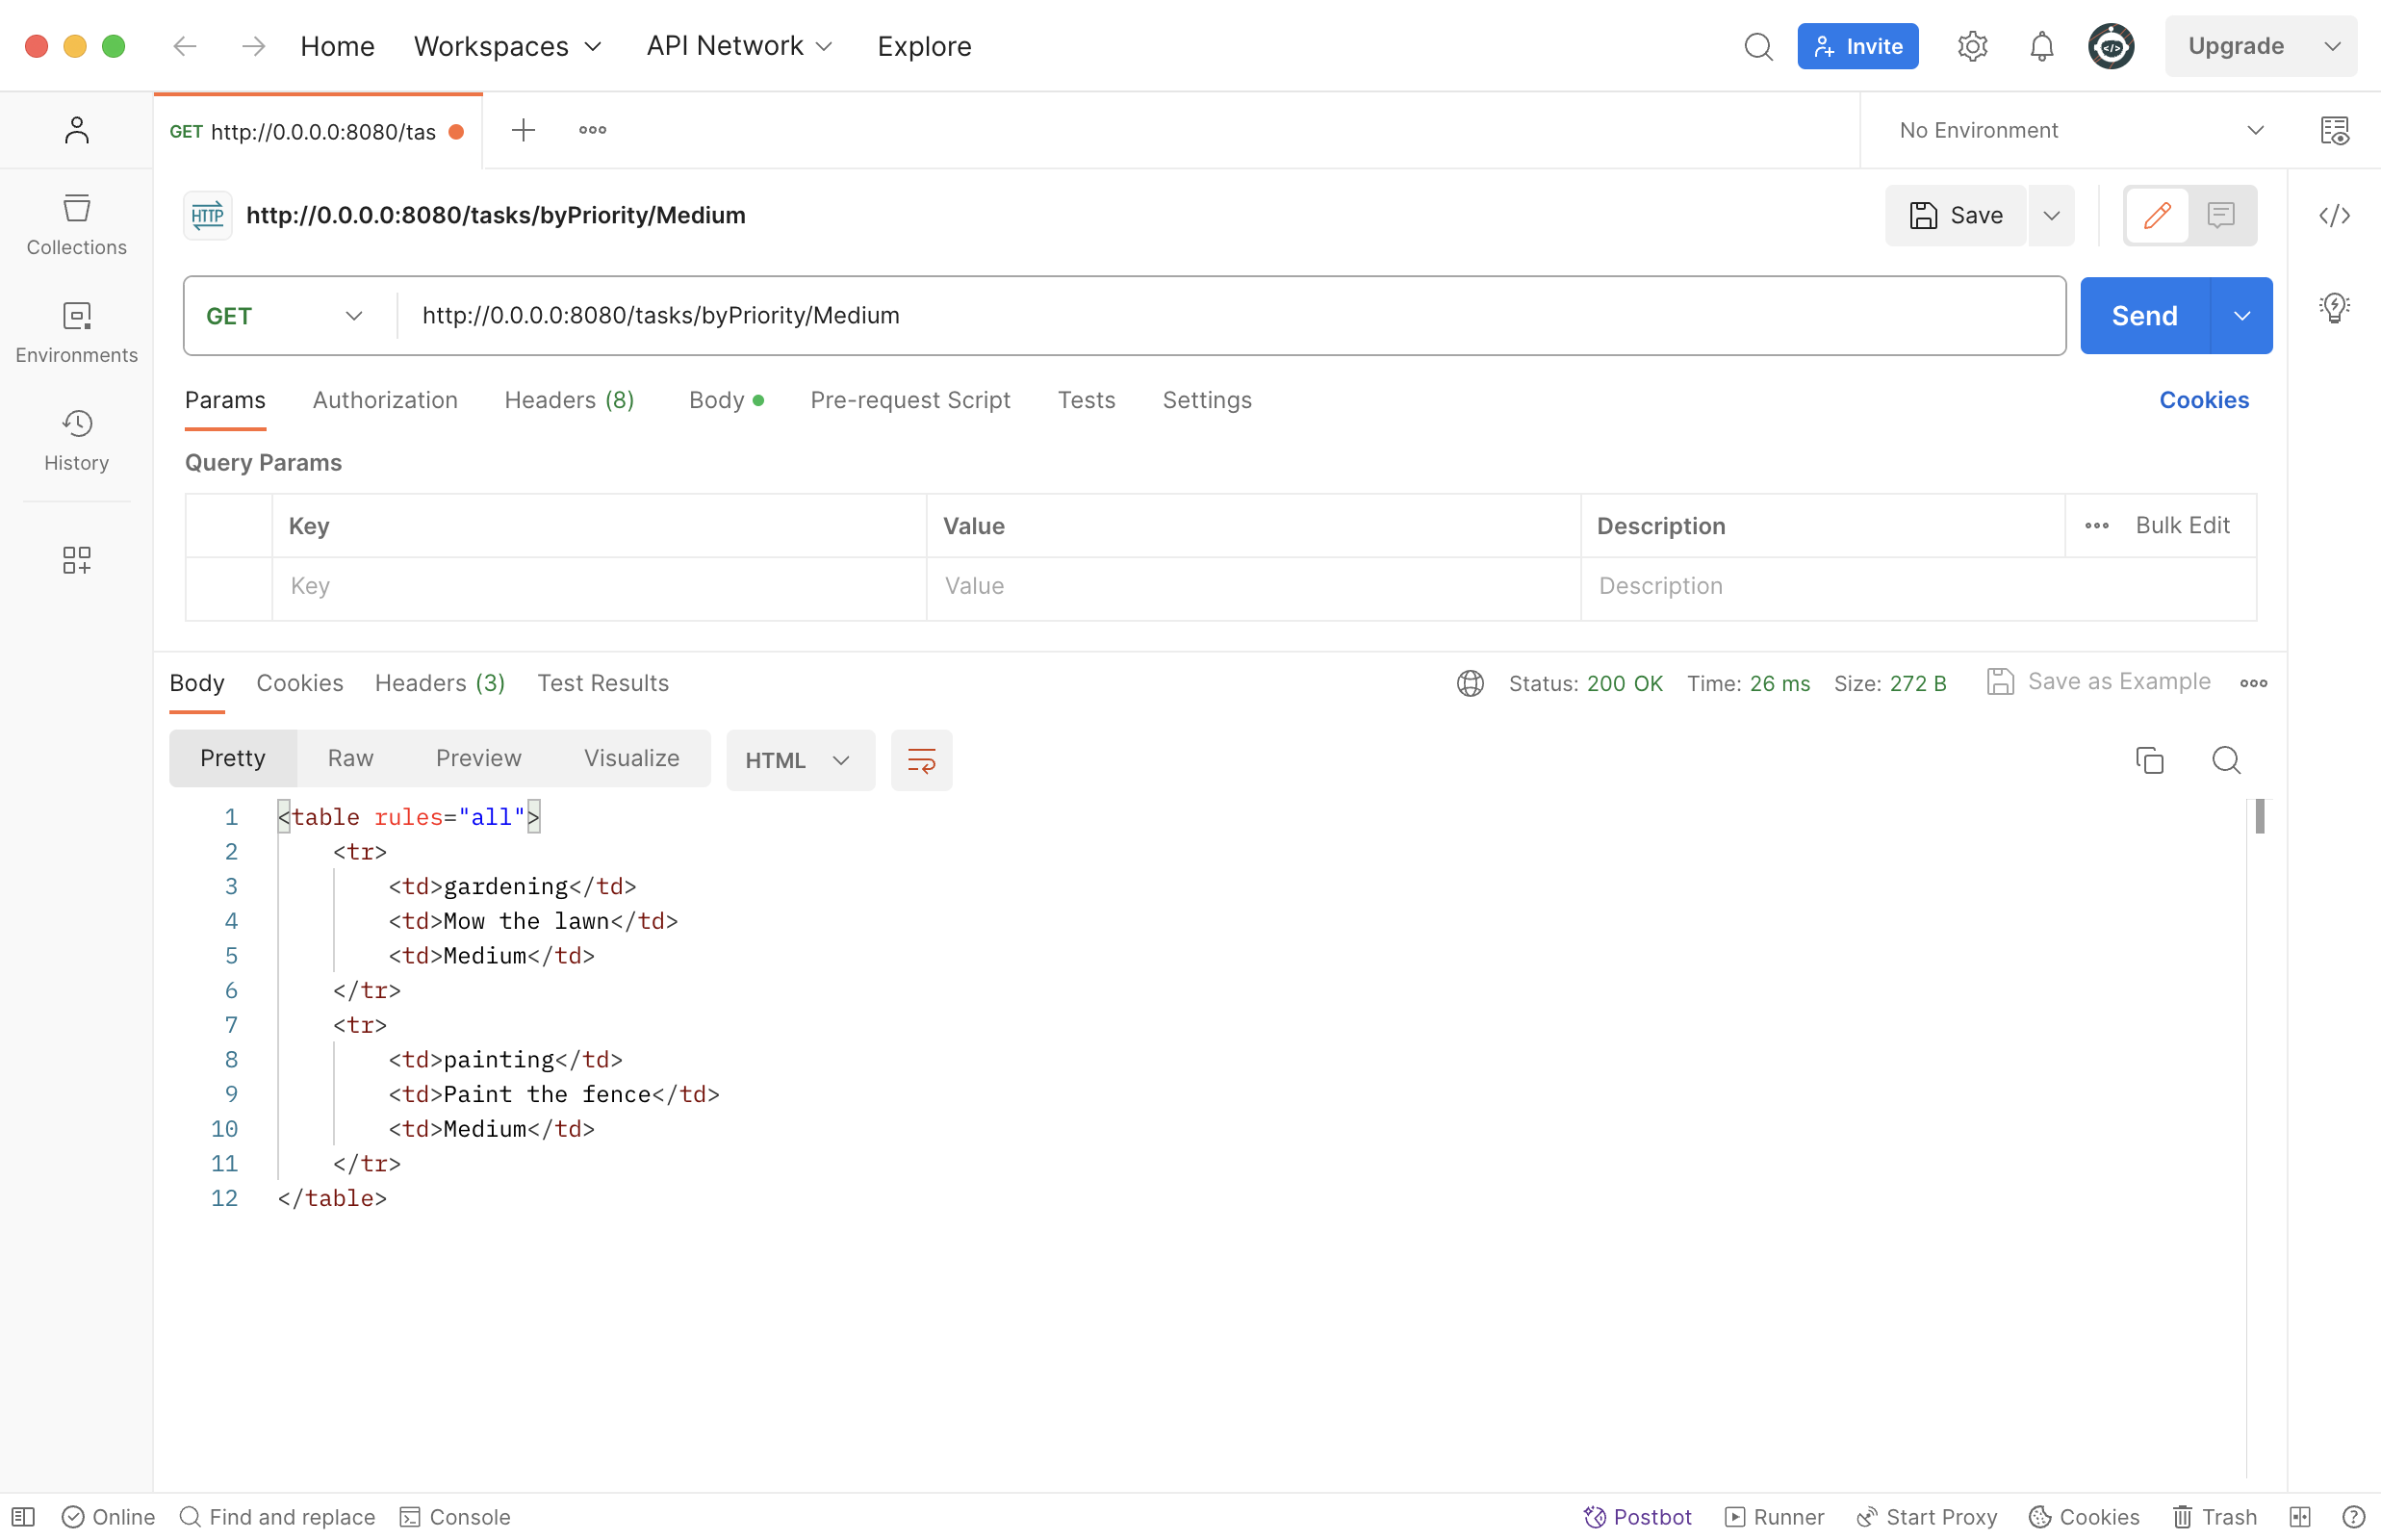
這會顯示伺服器的原始輸出,以及請求和回應的所有詳細資料。
若要檢查在請求重要任務時是否傳回
404狀態碼,請發送新的 GET 請求至http://0.0.0.0:8080/tasks/byPriority/Vital。接著你會在 Response 面板右上角看到顯示的狀態碼。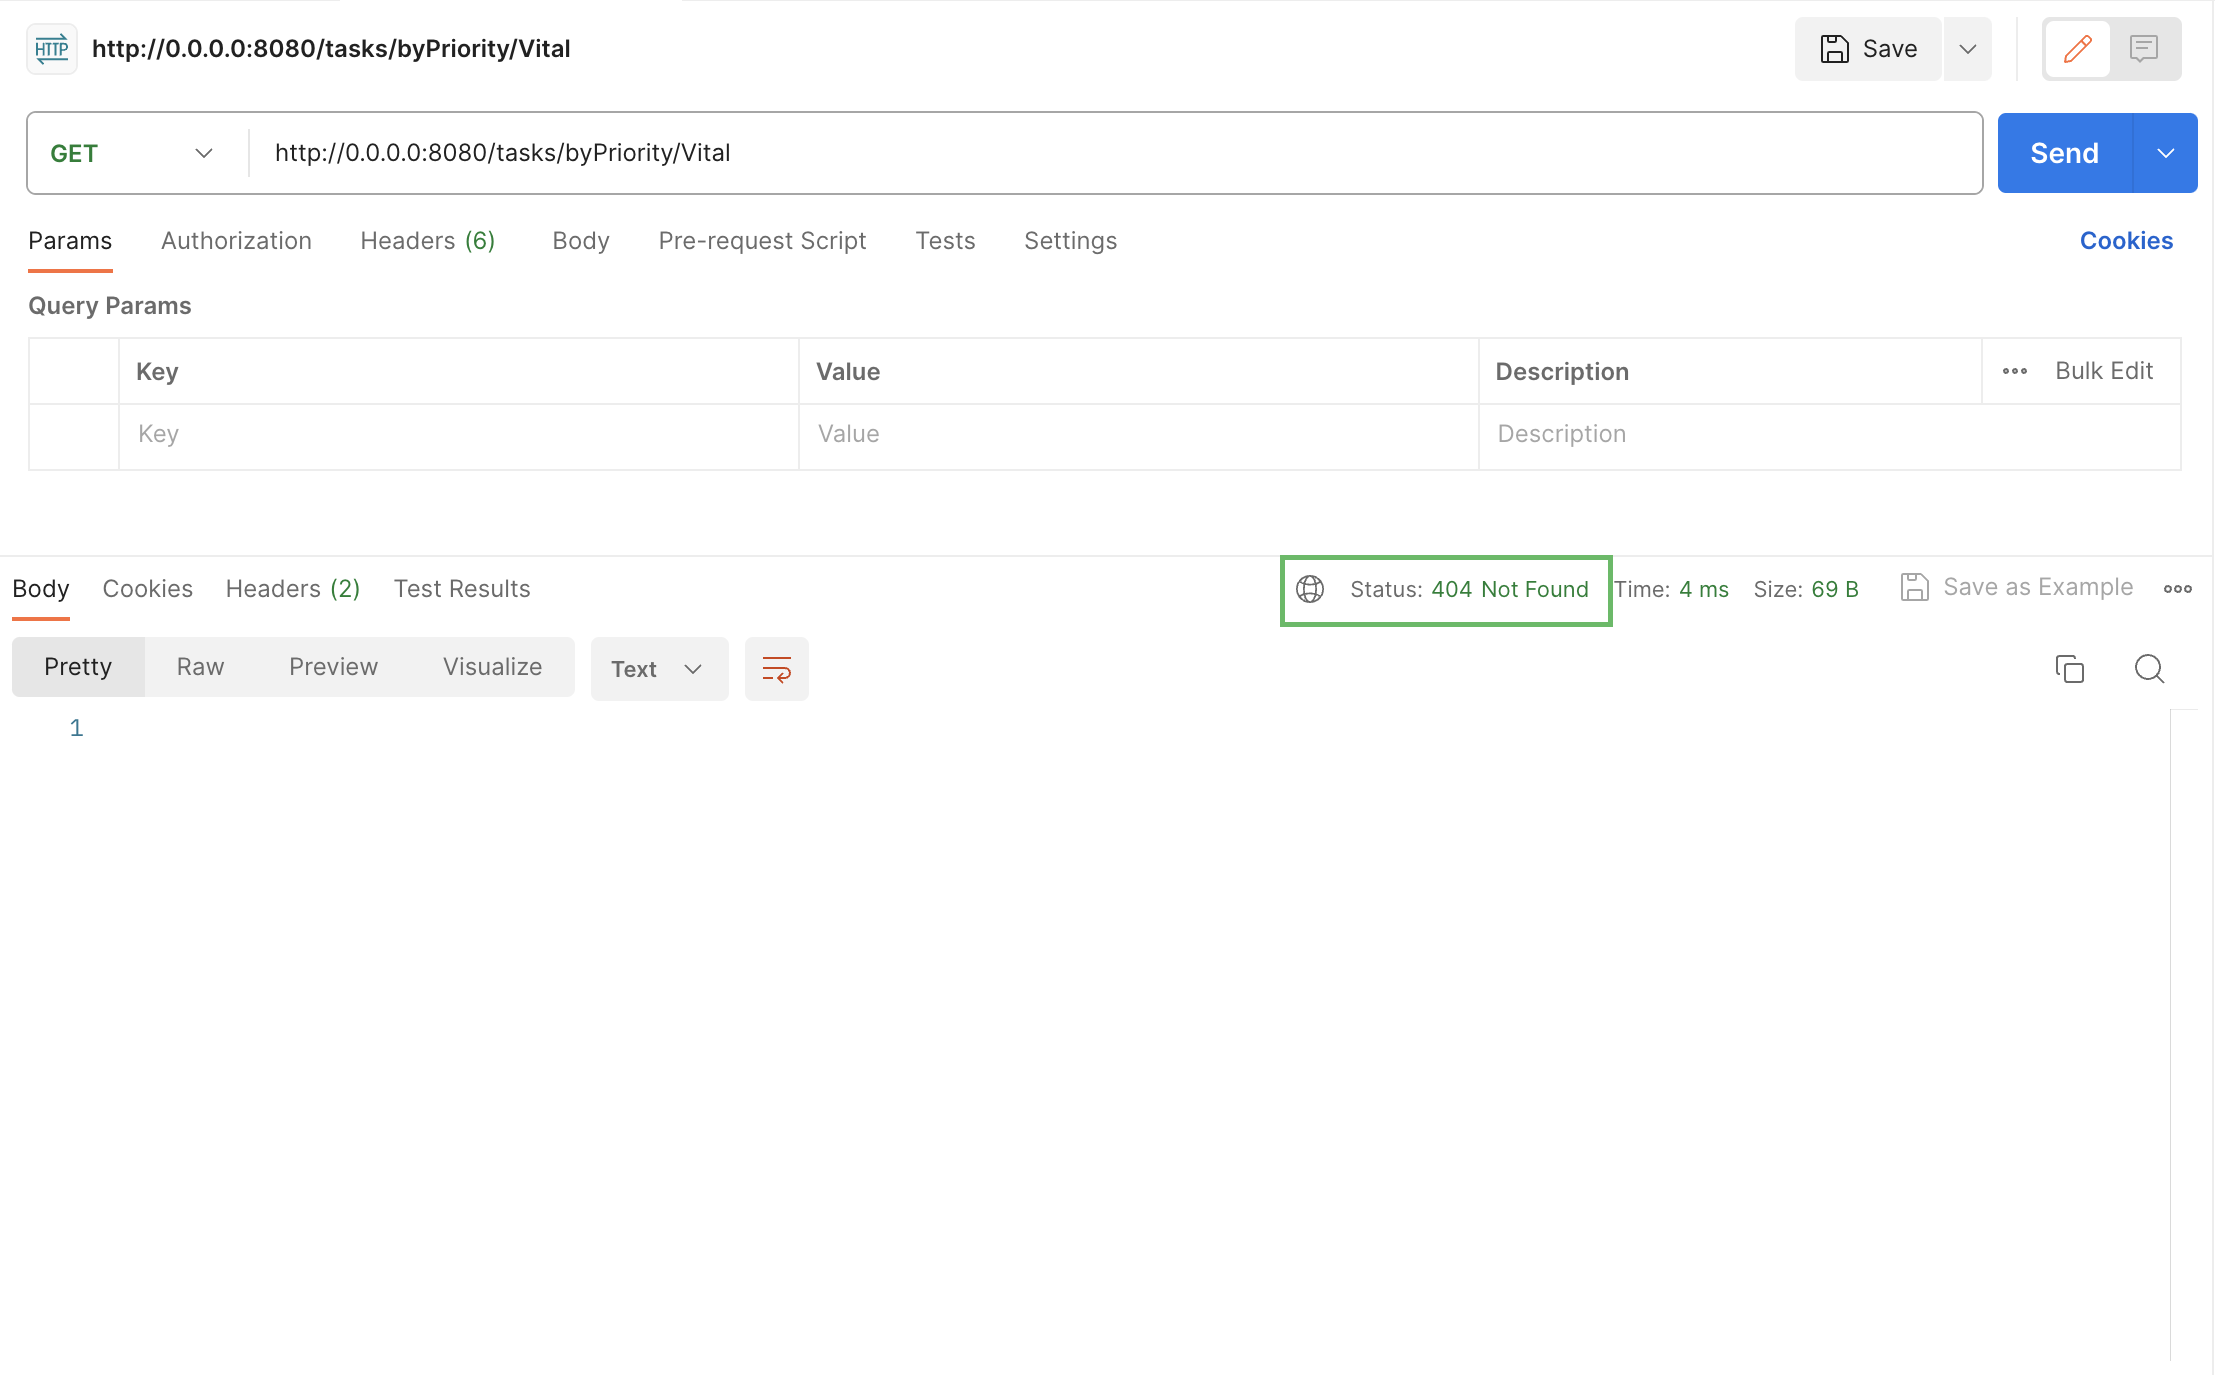
若要驗證在指定無效優先順序時是否會傳回
400狀態碼,請建立另一個帶有無效屬性的 GET 請求: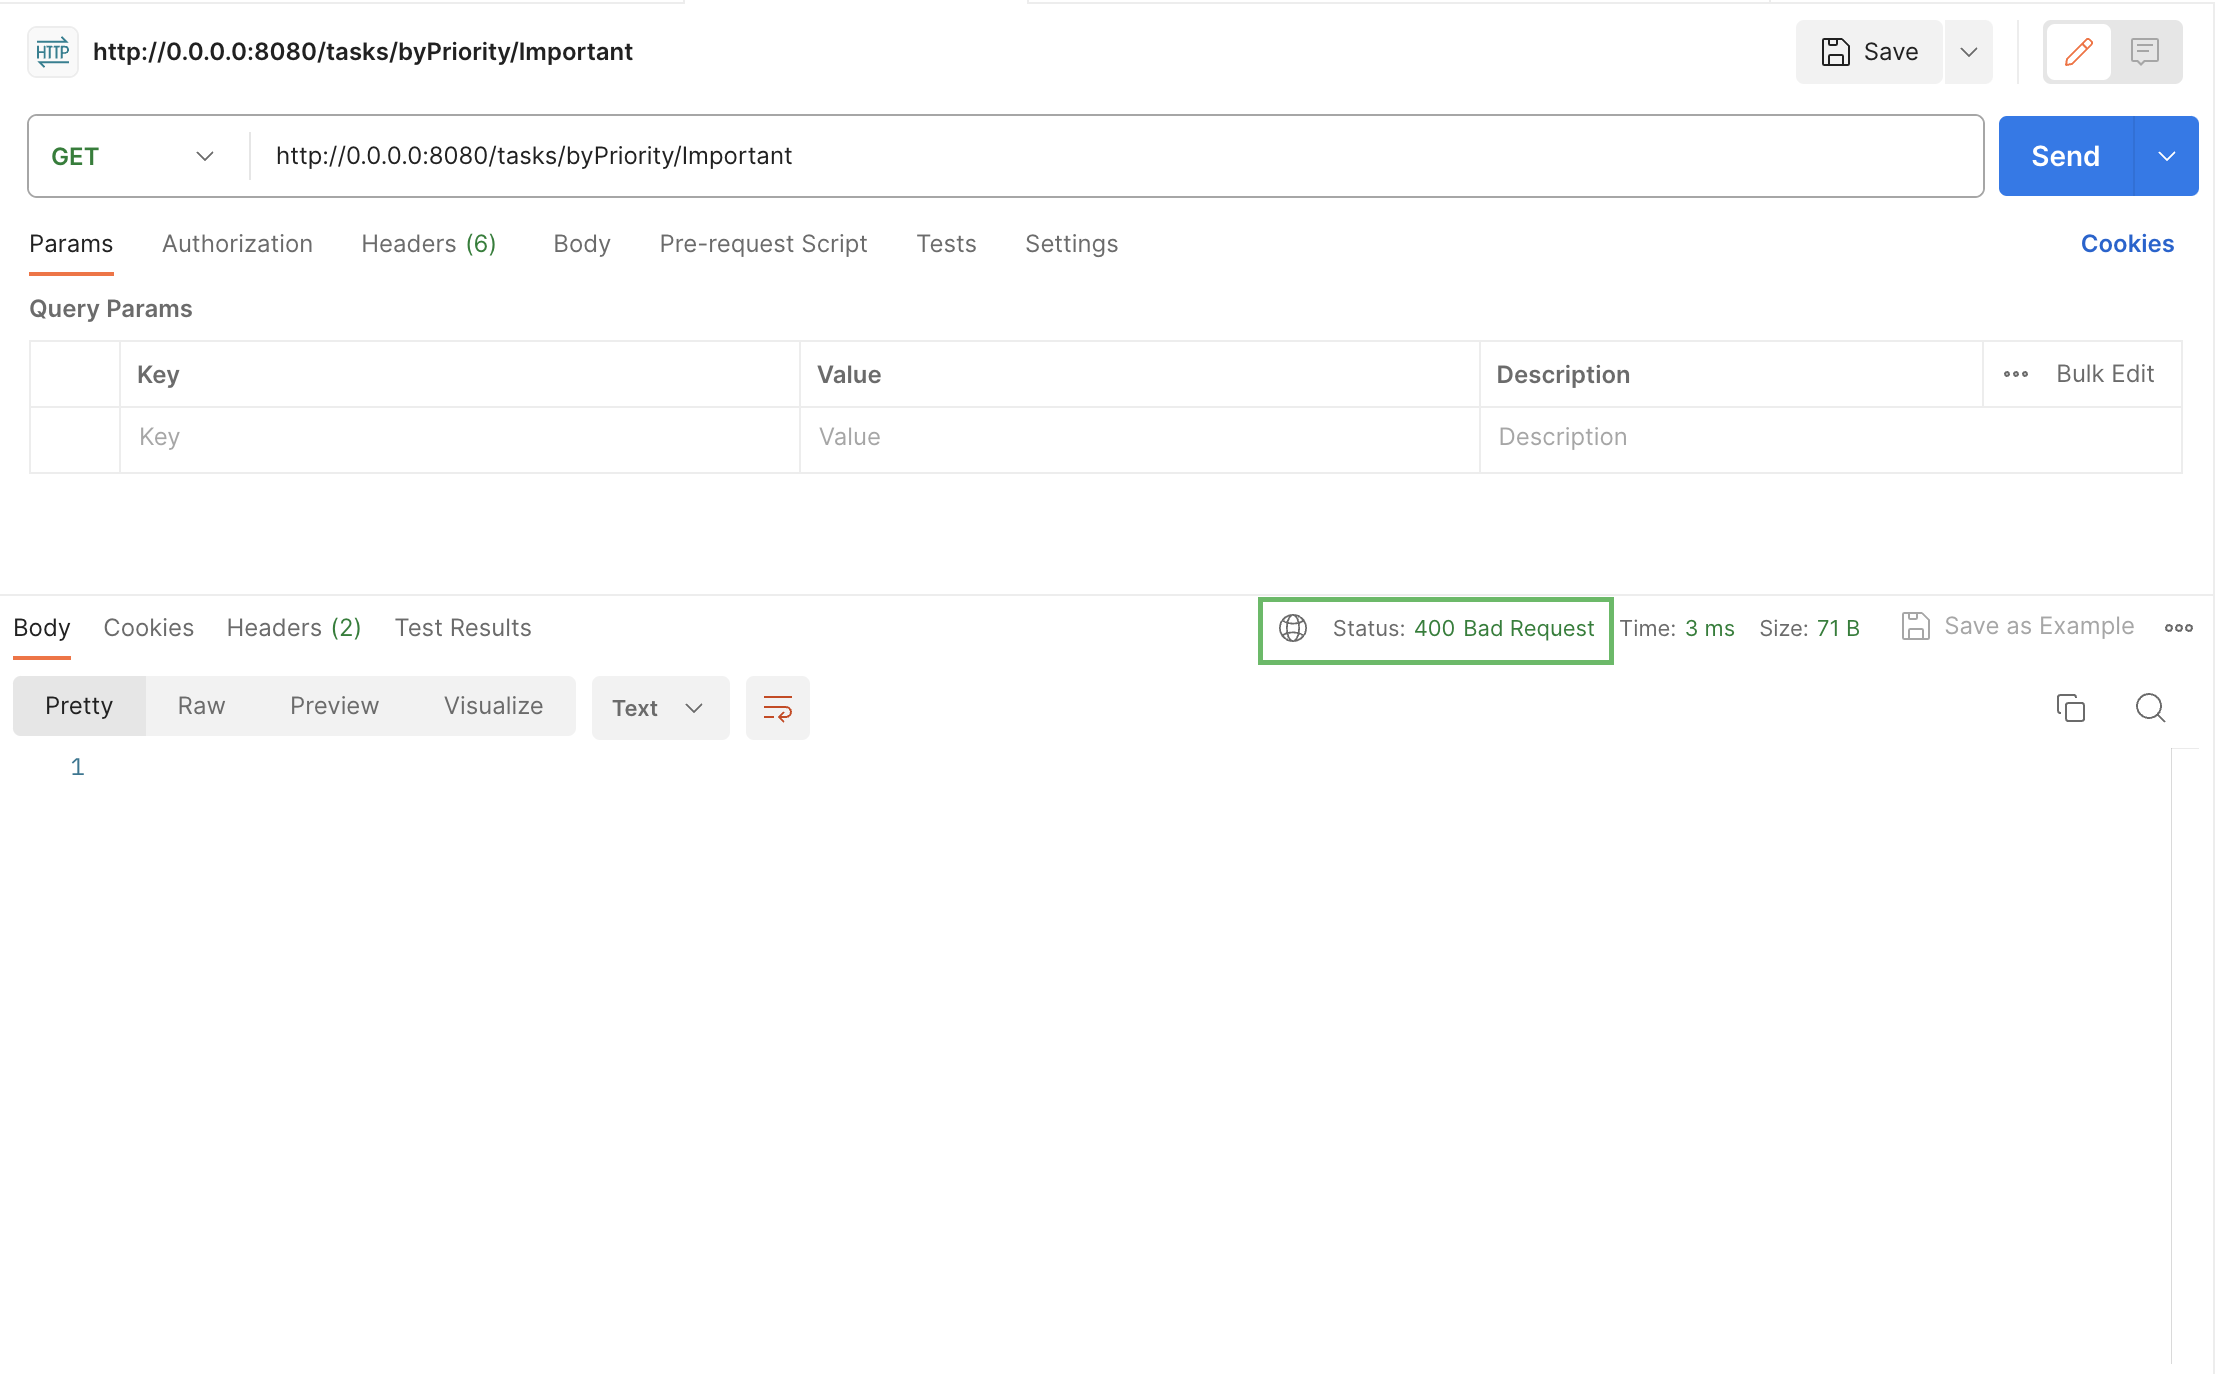
你可以透過在瀏覽器中請求不同的 URL 來測試此功能。
新增單元測試
到目前為止,你已經新增了兩個路由——一個用於擷取所有任務,另一個用於依優先順序擷取任務。像 Postman 這樣的工具能讓你完整測試這些路由,但它們需要手動檢查,並且是在 Ktor 外部執行。
在進行原型設計和小型應用程式中,這是可以接受的。然而,這種方法無法擴展到可能需要頻繁執行數千個測試的大型應用程式中。更好的解決方案是讓測試完全自動化。
Ktor 提供自己的測試框架了解如何使用專門的測試引擎來測試您的伺服器應用程式。以支援路由的自動化驗證。 接下來,你將為應用程式的現有功能編寫一些測試。
前往 src/test/kotlin 資料夾並開啟 ServerTest.kt 檔案。
將以下程式碼新增至 ServerTest.kt 檔案:
kotlinpackage com.example import io.ktor.client.request.get import io.ktor.client.request.header import io.ktor.client.request.post import io.ktor.client.request.setBody import io.ktor.client.statement.bodyAsText import io.ktor.http.ContentType import io.ktor.http.HttpHeaders import io.ktor.http.HttpStatusCode import io.ktor.http.formUrlEncode import io.ktor.server.testing.testApplication import kotlin.test.* class ServerTest { @Test fun tasksCanBeFoundByPriority() = testApplication { configure() val response = client.get("/tasks/byPriority/Medium") val body = response.bodyAsText() assertEquals(HttpStatusCode.OK, response.status) assertContains(body, "Mow the lawn") assertContains(body, "Paint the fence") } @Test fun invalidPriorityProduces400() = testApplication { configure() val response = client.get("/tasks/byPriority/Invalid") assertEquals(HttpStatusCode.BadRequest, response.status) } @Test fun unusedPriorityProduces404() = testApplication { configure() val response = client.get("/tasks/byPriority/Vital") assertEquals(HttpStatusCode.NotFound, response.status) } }在這些測試中的每一個,都會建立一個新的 Ktor 執行個體。這是在測試環境內部執行,而不是像 Netty 這樣的 Web 伺服器。由專案產生器為你編寫的模組會被載入,接著會叫用路由函式。然後你可以使用內建的
client物件向應用程式發送請求,並驗證傳回的回應。此測試可以在 IDE 內部執行,或作為 CI/CD 管線的一部分執行。
要在 IntelliJ IDEA 中執行測試,請點擊每個測試函式旁邊的裝訂邊圖示(
)。有關如何在 IntelliJ IDEA 中執行單元測試的詳細資訊,請參閱 IntelliJ IDEA 文件。
處理 POST 請求
你可以按照上述流程為 GET 請求建立任意數量的其他路由。這些路由允許使用者使用你喜歡的任何搜尋條件來擷取任務。但使用者可能也希望能建立新任務。
在這種情況下,合適的 HTTP 請求類型是 POST。POST 請求通常在使用者填寫並提交 HTML 表單時觸發。
與 GET 請求不同,POST 請求具有 body,其中包含表單上所有輸入欄位的名稱和值。此資訊會經過編碼,以區隔不同輸入欄位的資料並逸出非法字元。你不需要擔心此程序的細節,因為瀏覽器和 Ktor 會為我們處理好這一切。
接下來,你將透過以下步驟擴充現有應用程式以允許建立新任務:
建立靜態內容
在 src/main/resources 內,建立名為 task-ui 的新目錄。這將是存放靜態內容的資料夾。
在 task-ui 資料夾內,建立新的 task-form.html 檔案。
開啟新建立的 task-form.html 檔案並將以下內容新增至其中:
html<!DOCTYPE html> <html lang="en"> <head> <meta charset="UTF-8"> <title>Adding a new task</title> </head> <body> <h1>Adding a new task</h1> <form method="post" action="/tasks"> <div> <label for="name">Name: </label> <input type="text" id="name" name="name" size="10"> </div> <div> <label for="description">Description: </label> <input type="text" id="description" name="description" size="20"> </div> <div> <label for="priority">Priority: </label> <select id="priority" name="priority"> <option name="Low">Low</option> <option name="Medium">Medium</option> <option name="High">High</option> <option name="Vital">Vital</option> </select> </div> <input type="submit"> </form> </body> </html>
向 Ktor 註冊資料夾
前往 src/main/kotlin 內的 Routing.kt 檔案。
在
Application.configureRouting()函式中新增對staticResources()的以下呼叫:kotlinfun Application.configureRouting() { routing { // Add the following line staticResources("/task-ui", "task-ui") get("/tasks") { // ... } get("/tasks/byPriority/{priority?}") { //... } } }IDE 接著應該會自動新增以下匯入:
kotlinimport io.ktor.server.http.content.staticResources重新啟動應用程式。
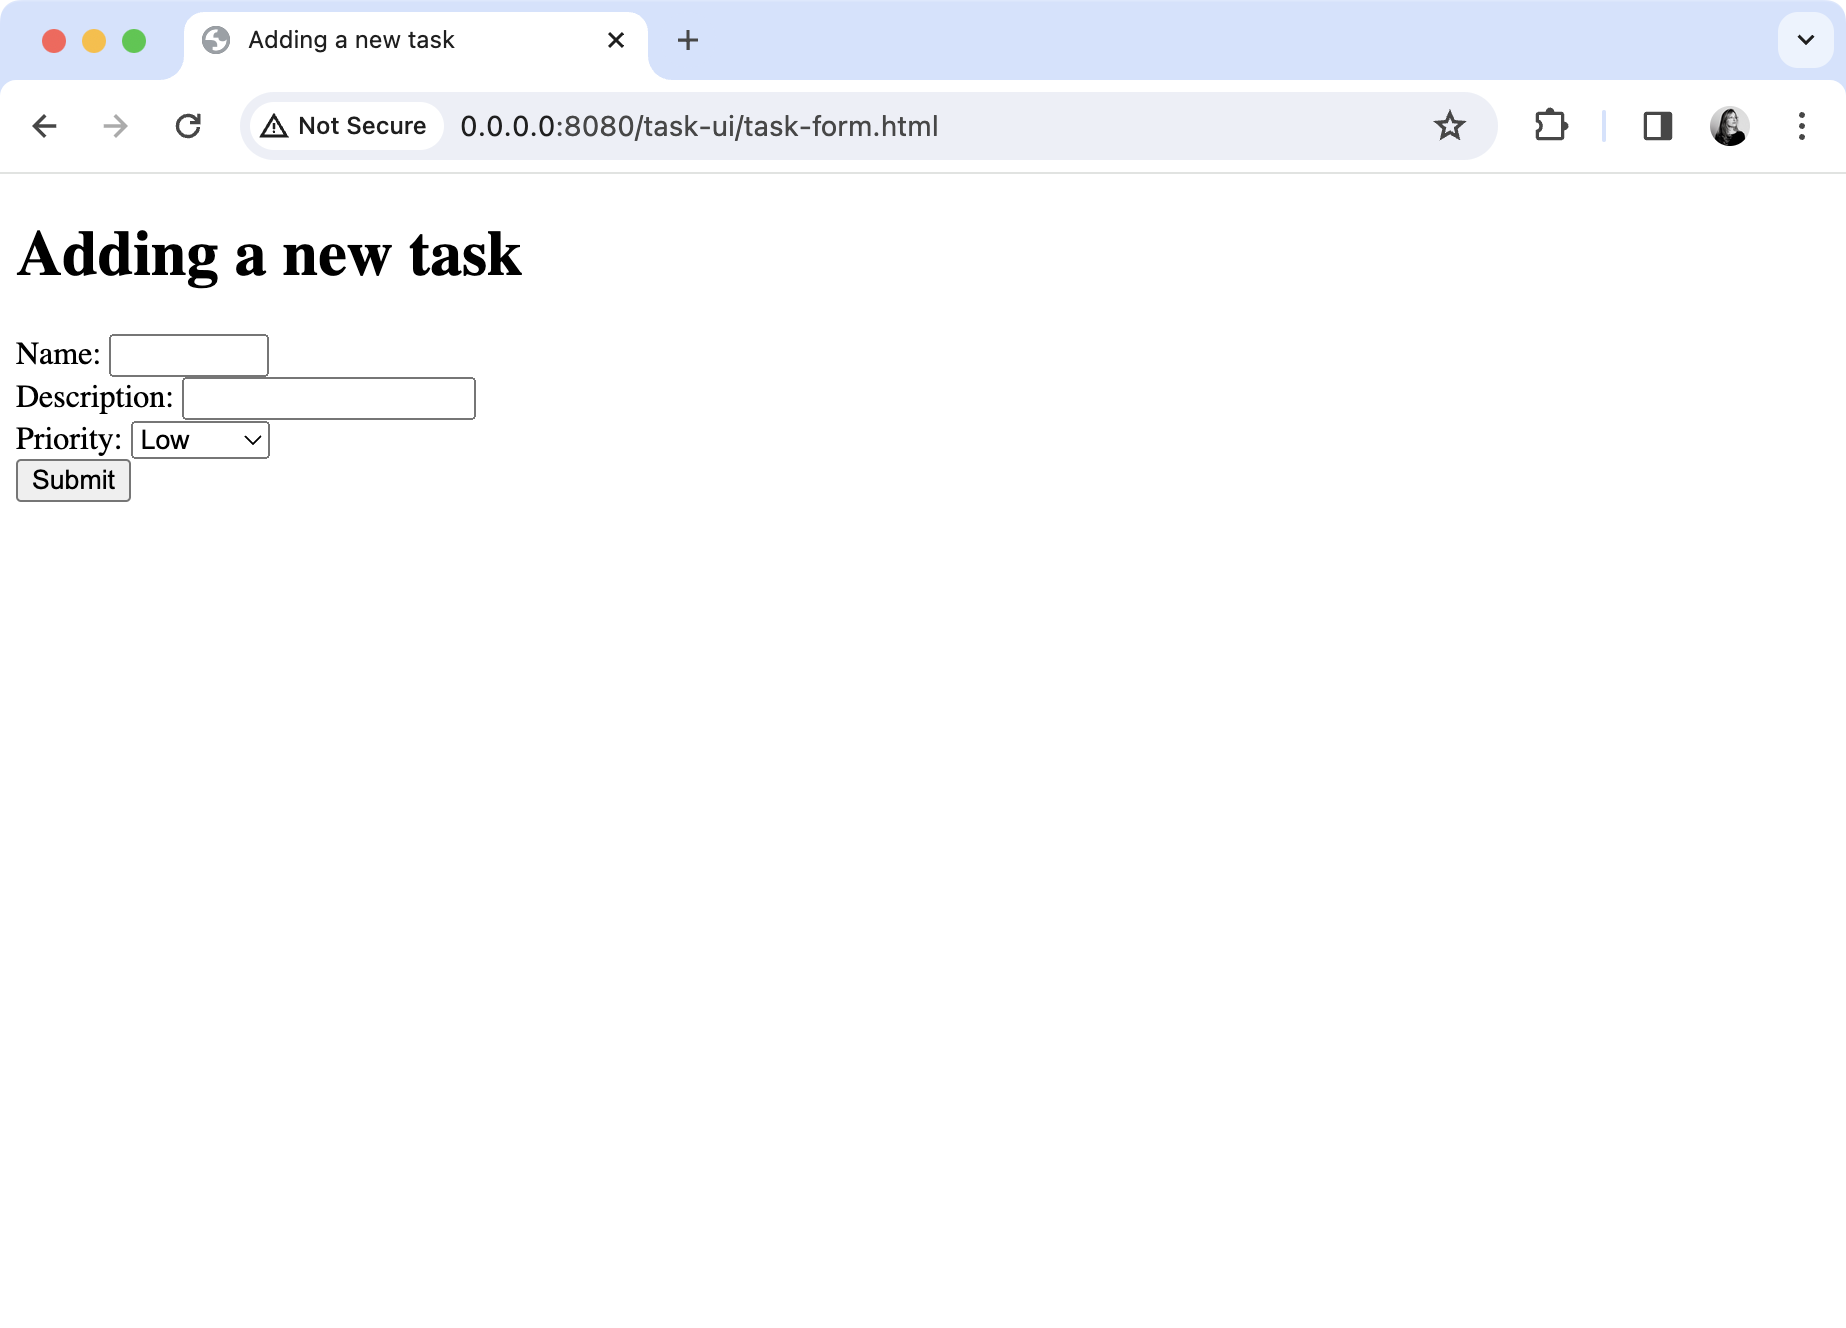
在瀏覽器中前往 http://0.0.0.0:8080/task-ui/task-form.html。應該會顯示 HTML 表單:
為表單新增處理常式
在 Routing.kt 檔案中,將以下額外路由新增至 .configureRouting() 函式中:
fun Application.configureRouting() {
    routing {
        //...

        //add the following route
        post("/tasks") {
            val formContent = call.receiveParameters()

            val params = Triple(
                formContent["name"] ?: "",
                formContent["description"] ?: "",
                formContent["priority"] ?: ""
            )

            if (params.toList().any { it.isEmpty() }) {
                call.respond(HttpStatusCode.BadRequest)
                return@post
            }

            try {
                val priority = Priority.valueOf(params.third)
                TaskRepository.addTask(
                    Task(
                        params.first,
                        params.second,
                        priority
                    )
                )

                call.respond(HttpStatusCode.NoContent)
            } catch (ex: IllegalArgumentException) {
                call.respond(HttpStatusCode.BadRequest)
            } catch (ex: IllegalStateException) {
                call.respond(HttpStatusCode.BadRequest)
            }
        }
    }
}
新路由對應到 POST 請求而非 GET 請求。Ktor 透過呼叫 .receiveParameters() 來處理請求的 body。這會傳回請求主體中存在之參數的集合。
共有三個參數,因此你可以將關聯的值存儲在 Triple 中。如果參數不存在,則改為存儲空字串。
如果任何值為空,伺服器將傳回帶有 400 狀態碼的回應。接著,它會嘗試將第三個參數轉換為 Priority,如果成功,則會以新的 Task 將資訊新增至存儲庫。這兩項操作都可能導致擲出例外,在此情況下會再次傳回 400 狀態碼。
否則,若一切成功,伺服器會向用戶端傳回 204 No Content 狀態碼。這表示請求已成功,但沒有新的資訊需要作為結果傳回。
測試完成的功能
重新啟動應用程式。
在表單中填入範例資料,然後點擊 Submit。
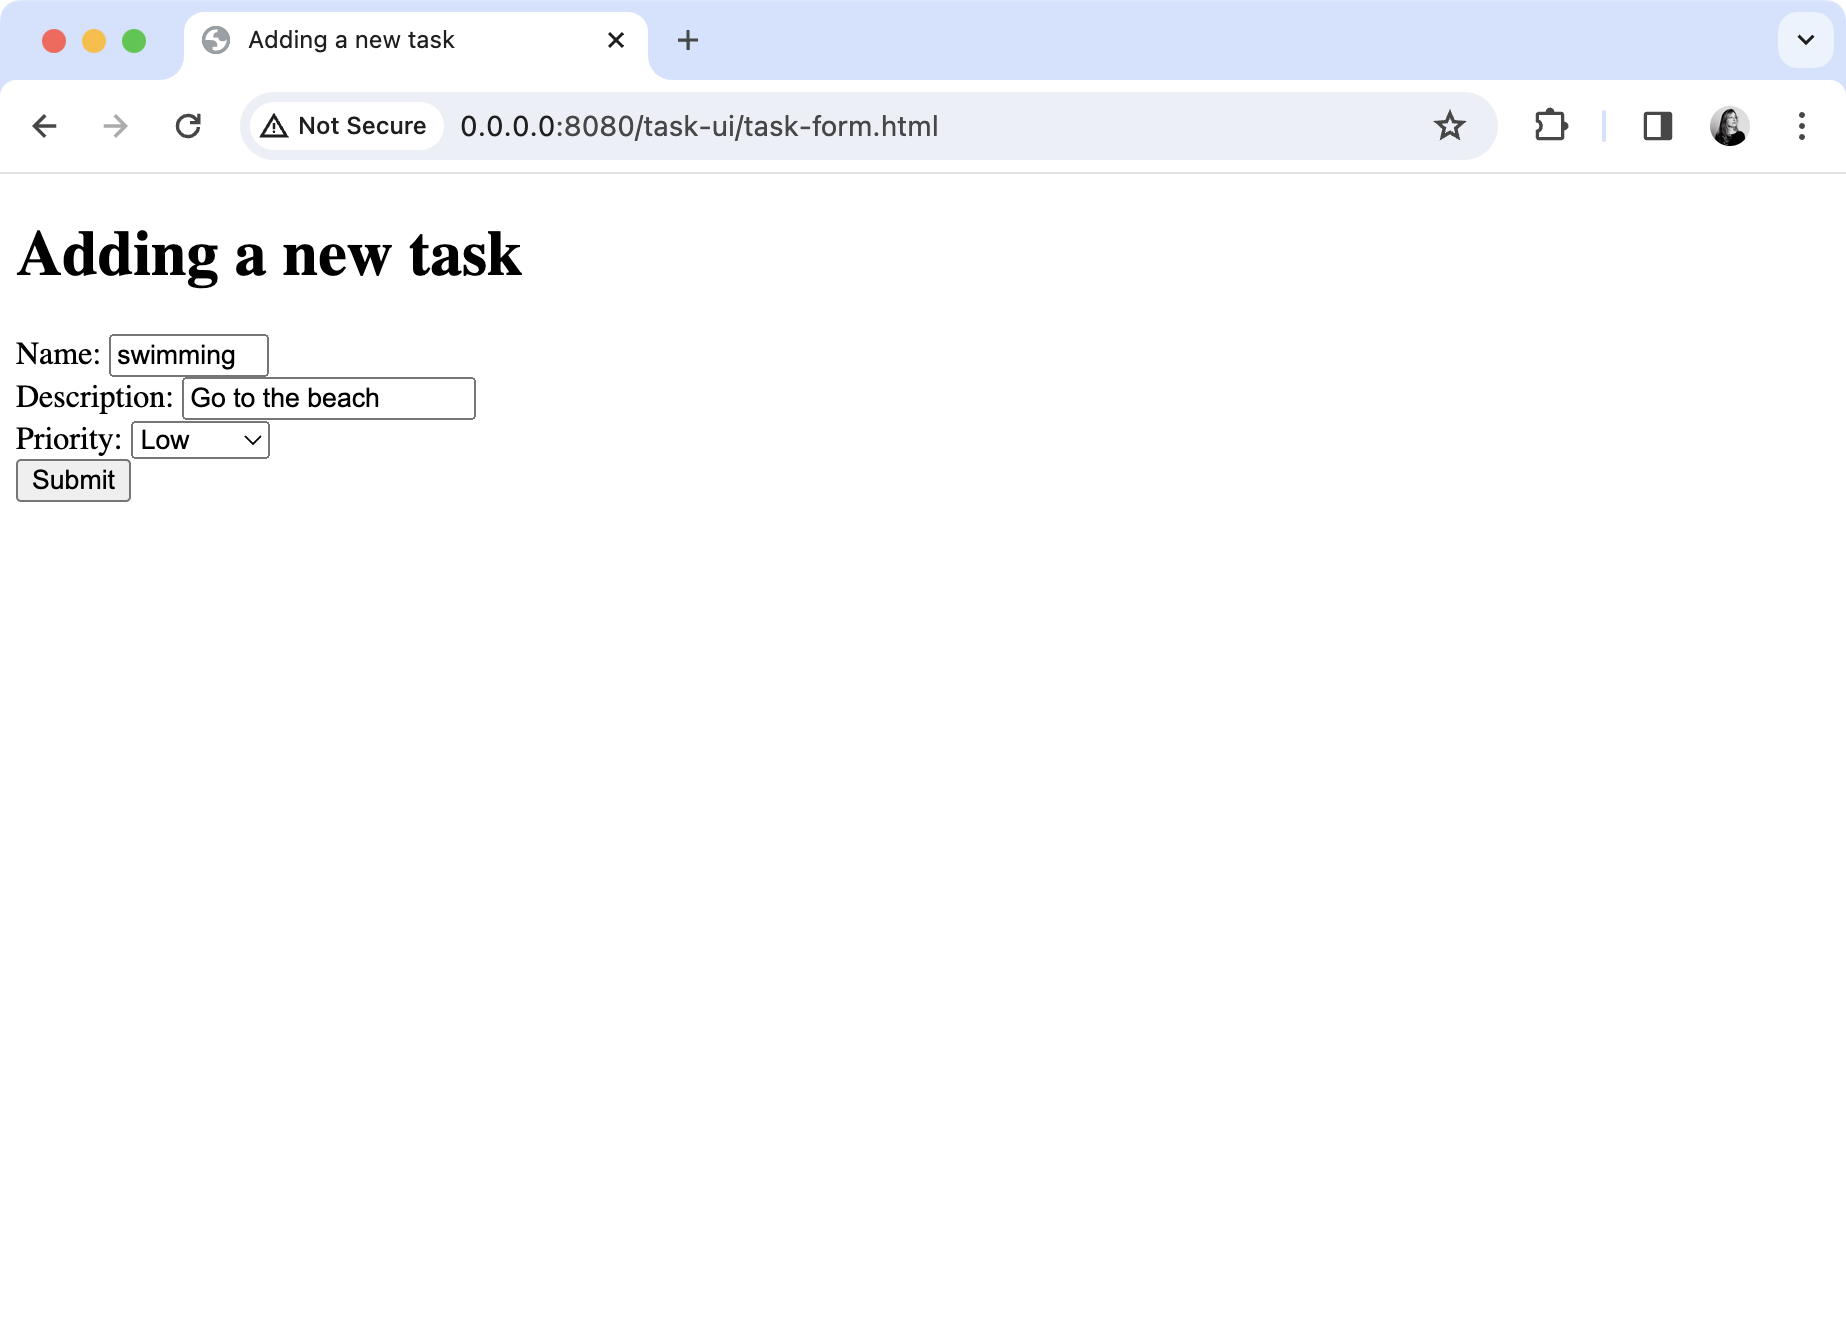
提交表單時,你不應該被導向至新頁面。
前往 URL http://0.0.0.0:8080/tasks。你應該會看到新任務已新增。
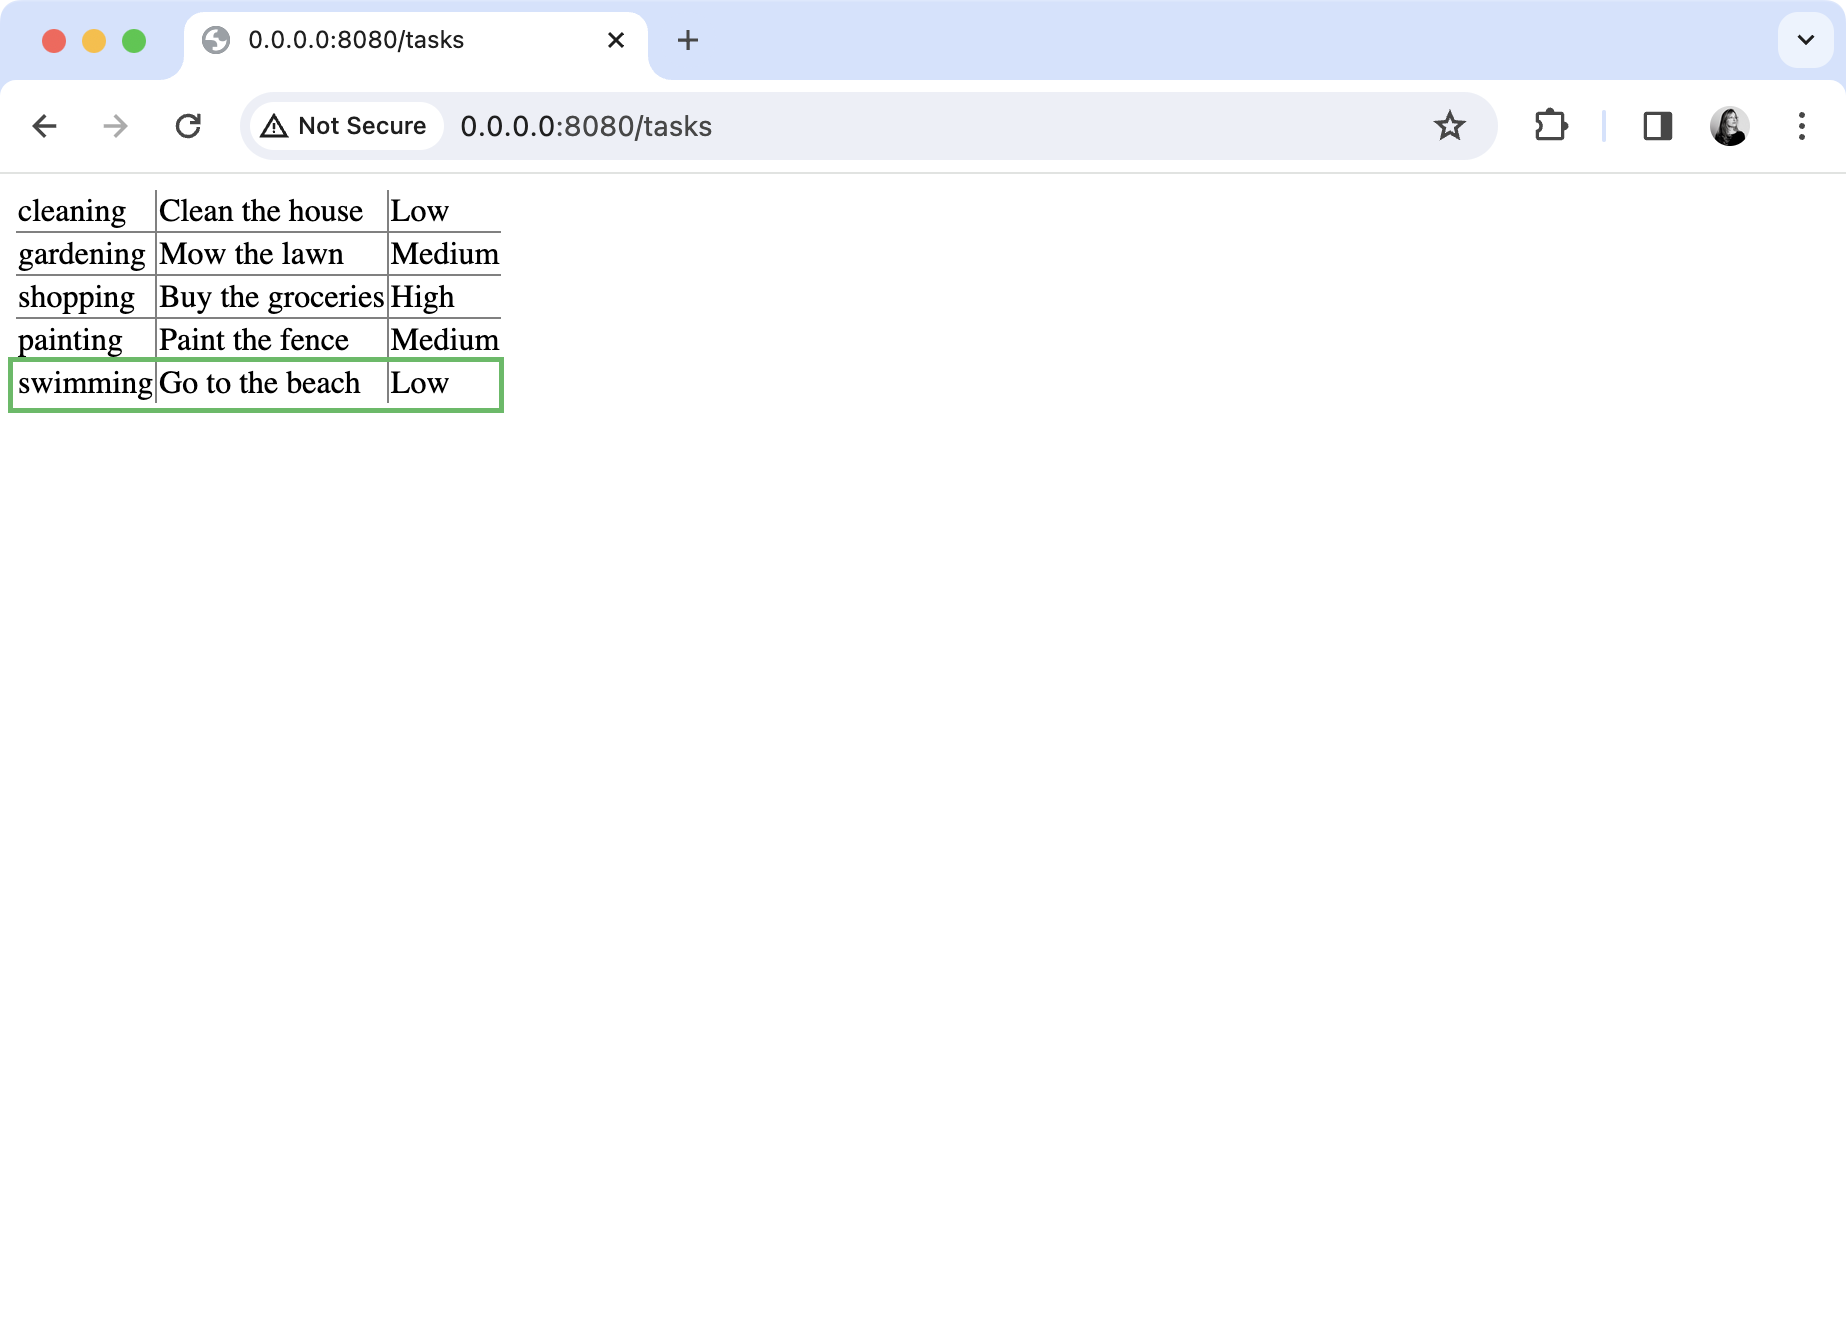
若要驗證該功能,請將以下測試新增至 ServerTest.kt 檔案:
kotlinpackage com.example import io.ktor.client.request.get import io.ktor.client.request.header import io.ktor.client.request.post import io.ktor.client.request.setBody import io.ktor.client.statement.bodyAsText import io.ktor.http.ContentType import io.ktor.http.HttpHeaders import io.ktor.http.HttpStatusCode import io.ktor.http.formUrlEncode import io.ktor.server.testing.testApplication import kotlin.test.* class ServerTest { @Test fun tasksCanBeFoundByPriority() = testApplication { configure() val response = client.get("/tasks/byPriority/Medium") val body = response.bodyAsText() assertEquals(HttpStatusCode.OK, response.status) assertContains(body, "Mow the lawn") assertContains(body, "Paint the fence") } @Test fun invalidPriorityProduces400() = testApplication { configure() val response = client.get("/tasks/byPriority/Invalid") assertEquals(HttpStatusCode.BadRequest, response.status) } @Test fun unusedPriorityProduces404() = testApplication { configure() val response = client.get("/tasks/byPriority/Vital") assertEquals(HttpStatusCode.NotFound, response.status) } @Test fun newTasksCanBeAdded() = testApplication { configure() val response1 = client.post("/tasks") { header( HttpHeaders.ContentType, ContentType.Application.FormUrlEncoded.toString() ) setBody( listOf( "name" to "swimming", "description" to "Go to the beach", "priority" to "Low" ).formUrlEncode() ) } assertEquals(HttpStatusCode.NoContent, response1.status) val response2 = client.get("/tasks") assertEquals(HttpStatusCode.OK, response2.status) val body = response2.bodyAsText() assertContains(body, "swimming") assertContains(body, "Go to the beach") } }在此測試中,向伺服器發送了兩個請求:建立新任務的 POST 請求,以及確認新任務已新增的 GET 請求。在發送第一個請求時,使用
setBody()函式將內容插入到請求的 body 中。測試框架在集合上提供了.formUrlEncode()擴充函式,它將如同瀏覽器格式化資料的程序進行了抽象封裝。
重構路由
如果你檢視到目前為止的路由,會發現所有路由都以 /tasks 開頭。你可以透過將它們放入各自的子路由中來消除這種重複:
fun Application.configureRouting() {
    routing {
        staticResources("/task-ui", "task-ui")

        route("/tasks") {
            get {
                //Code remains the same
            }

            get("/byPriority/{priority?}") {
                //Code remains the same
            }

            post {
                //Code remains the same
            }
        }
    }
}
如果你的應用程式發展到具有多個子路由的階段,那麼將每個子路由放入各自的幫助程式函式中是適當的做法。不過目前還不需要這樣做。
路由組織得越好,就越容易對其進行擴充。例如,你可以新增一個依名稱尋找任務的路由:
fun Application.configureRouting() {
    routing {
        staticResources("/task-ui", "task-ui")

        route("/tasks") {
            get {
                // Code remains the same
            }
            get("/byName/{taskName}") {
                val name = call.parameters["taskName"]
                if (name == null) {
                    call.respond(HttpStatusCode.BadRequest)
                    return@get
                }

                val task = TaskRepository.taskByName(name)
                if (task == null) {
                    call.respond(HttpStatusCode.NotFound)
                    return@get
                }

                call.respondText(
                    contentType = ContentType.parse("text/html"),
                    text = listOf(task).tasksAsTable()
                )
            }

            get("/byPriority/{priority?}") {
                // Code remains the same
            }

            post {
                // Code remains the same
            }
        }
    }
}
後續步驟
現在你已經實作了基本的路由和請求處理功能。此外,你也接觸了驗證、錯誤處理和單元測試。所有這些主題都將在後續的教學中進一步展開。
繼續前往下一篇教學了解如何使用 Kotlin 和 Ktor 建置後端服務,其中包含一個產生 JSON 檔案的 RESTful API 範例。,了解如何為任務管理器建立可產生 JSON 檔案的 RESTful API。